If important emails from external senders are ending up in your GMail or Google Workspace account, you should take the step to “whitelist” the email address of the sender. A common example might be email received from your website’s contact for lead generation forms. Whitelisting involves a simple process of creating a set of rules stipulating what action Gmail should take when encountering emails from the sending address.
Whitelisting an Incoming Email Address (on Desktop or Laptop)
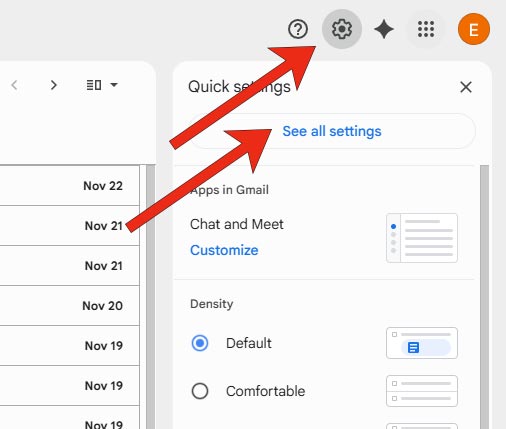
1) Login to your Gmail / Google Workspace account, click on the gear icon and select “See all settings”
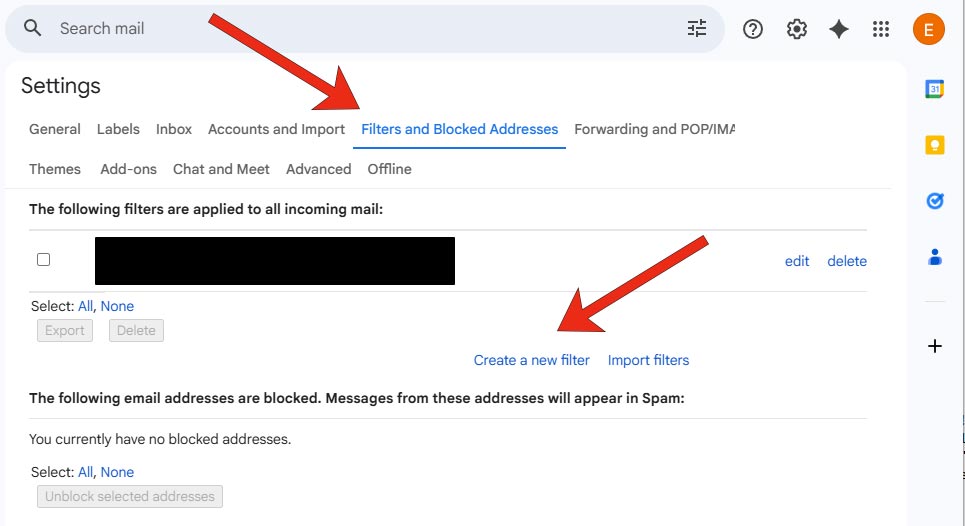
2) Select “Filters and Blocked Addresses” and then, “Create a new filter” at the end of any previously created filters
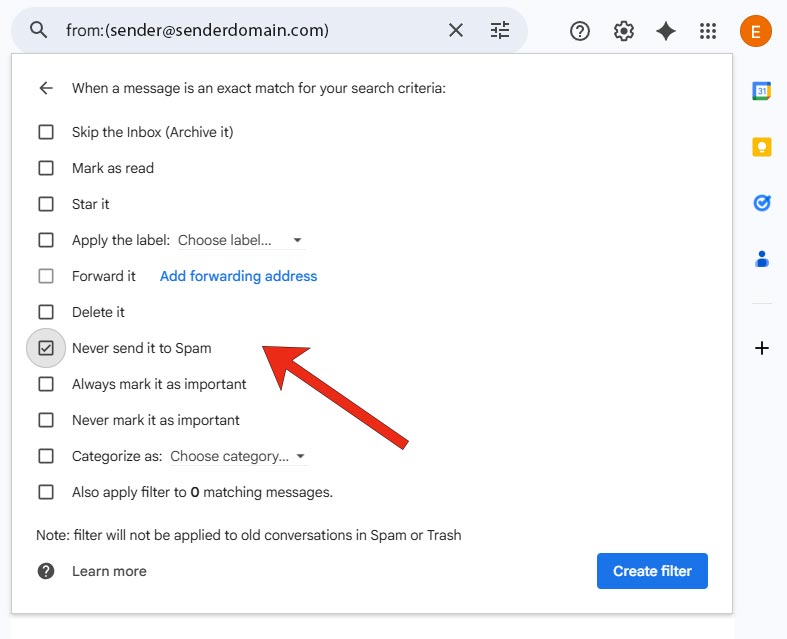
3) Add the sender’s email address, for example, sender@senderdomain.com to the whitelist in the “From” field. Then, click “Create filter”

4) Click the “Never send to Spam” check box. Optionally, click the “Always mark it as important” checkbox. Then click “Create Filter”.
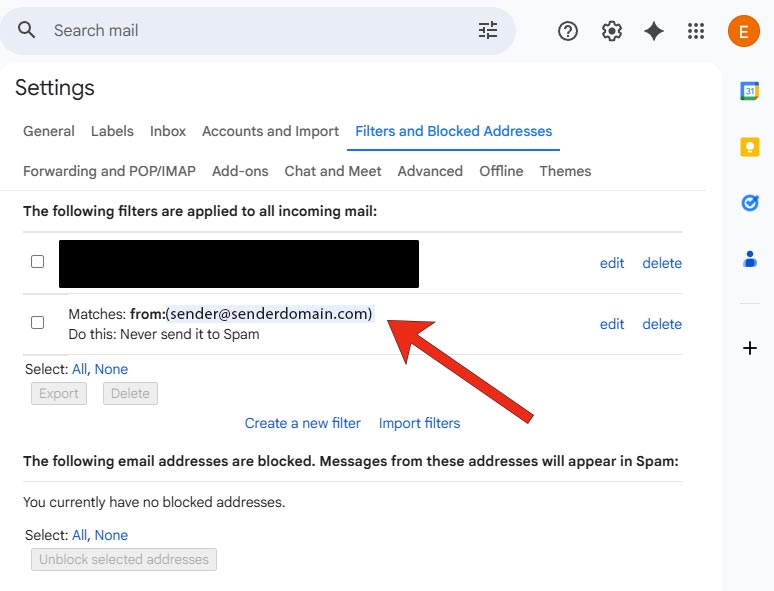
5) The filter should now appear at the end of your list of current filters. Good job!
Google’s filter options are a powerful email management tool for your account. Whitelisting is only one way to take advantage of its capabilities. For example, you can automatically archive low priority emails by subject line or sender, highlight a particular sender’s email as important, move emails from the Social tab to the Inbox, or send emails with attachments to a “folder” where you can download and delete them to save storage space. Feel free to experiment!